TcMenu - Overview and quick start
Menu library and designer for Arduino and mbed TcMenu is a modular, IoT ready multi-level menu library for Arduino and mbed supporting many input, display and IoT / remote interfaces. It makes presenting configuration, status and operational information much easier. First, you design your menu structure using the designer UI, then using the code generator you convert your menu structure into Arduino, mbed or Raspberry-PI compatible code that works with your chosen hardware through plugins.
Multi language locale based menu for Arduino and mbed
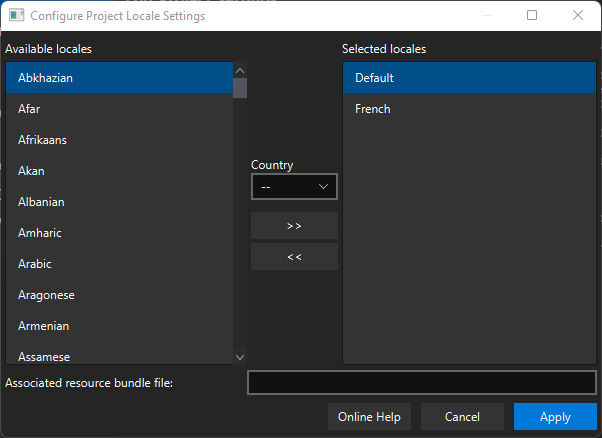
TcMenu 4.0 onward supports multi-language menus based on resource bundles which are effectively properties files containing language translations. The designer lets you set up translations on a per-locale basis for the app name, each menu item, and even for additional strings in your application. Once enabled the properties files are turned into a series of C++ include header files that you can choose between using a TC_LOCALE_?? setting described below.
Rendering using themes - properties, grids and icons
Most display plugins can be customized using TcThemeBuilder, a utility class that allows you to simply configure fonts, colors, spacing, grids and icons. To the left you can see cool-blue theme with a multi-column grid layout. Grids allow for multi-column menus by breaking rows up into multiple columns. You can configure graphical settings at the default level, or even override settings for a specific menu item. Choosing a theme to get started in a new project To avoid having to define the fonts, spacing, colors and other details from scratch, we have a few starter themes that can be applied out of the box.
Setting up IO-expanders in the menu designer
Setting up IO devices has been made much easier as of V2.2 of the designer software. you can now directly edit the IO expander configurations directly within tcMenu. When we discuss IO devices we are talking about IoAbstractionRef objects that refer to either device pins, or any other device such as I2C expanders or shift registers from the IoAbstraction library. In order to manage the IO Expanders that are available within a project you can do so from the Code menu -> Show Io Expanders.
Integrating EEPROM support into menu applications
IoAbstraction EEPROM support can be integrated into your menu application, it can be used to load and store menu item values, authentication and also choice menu items that are using EEPROM storage. Menu Manager makes it very easy to save values to EEPROM between runs. Each menu item can optionally have a storage point in the EEPROM area (-1 / 0xffff means not stored). Any items that have a valid EEPROM address will be persisted upon calling the save function on menuMgr, and similarly, will be read back by calling load.
Securing sub-menus and remote connections with an Authenticator
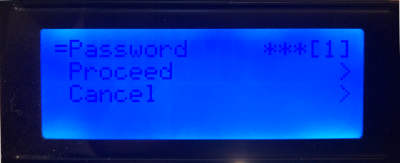
You can secure both sub-menu items and remote connections using an Authenticator. In summary, when an authenticator is present on menuMgr any attempt to show a secure sub menu will result in a dialog asking for the pin; only proceeding to display the sub menu if the pin matches the on in authenticator. In addition, all remote/IoT connections will only be allowed if the authenticator approves the connection. An example of the secure sub-menu pin entry screen is below:
Taking over the display from a renderer
TcMenu allows you to take over the display from the renderer very easily, and once you own the display, you will be called back at regular intervals by the rendering class. During the time that you’ve taken over the display or presented a dashboard, you’re responsible for the user input and rendering. Please note that you should never update the screen outside of these callbacks, as doing so would interfere with TcMenu rendering.
MenuManager and menu iteration
MenuManager contains the functions to manage menu items, there is a global instance of this class called menuMgr on Arduino and mbed boards. Here we present the most commonly used features, check out the reference docs for more details. There are a lot of iteration helper functions that can be used to navigate through menu structures. These are described further down the page. The following two reference documentation pages extend on the information here:
LiquidCystalIO with PCF8574 i2c backpack
An I2C LCD backpack based on the PCF8574 chip provides an easy way to get started with LiquidCrystalIO on most Arduino boards. It is usually in one of two configurations as listed below. This library works correctly with the display and even has a shorthand way of creating the LCD for this case. Connectivity combinations for i2c backpacks Pin Option1 Option2 0 RS EN 1 RW RW 2 EN RS 3 Backlight Backlight 4 D4 D4 5 D5 D5 6 D6 D6 7 D7 D7 Construction for Option 1 outside of any functions (global):
Rendering menus to TFT, LCD and OLED using tcMenu
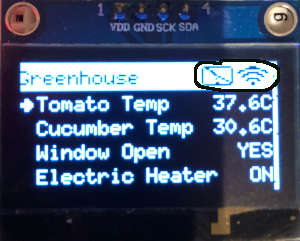
TcMenu supports a wide range of rendering devices, from HD44780 based units using our LiquidCrystal fork through to mono OLEDs and full colour TFT displays using Adafruit_GFX and TFT_eSPI library. Over to the left you see an example of rendering to OLED device with title widgets. You can also easily take over the display to draw your own screen at any time. This is such a large subject, it deserves a page of its own.
