Setting up IO devices has been made much easier as of V2.2 of the designer software. you can now directly edit the IO expander configurations directly within tcMenu.
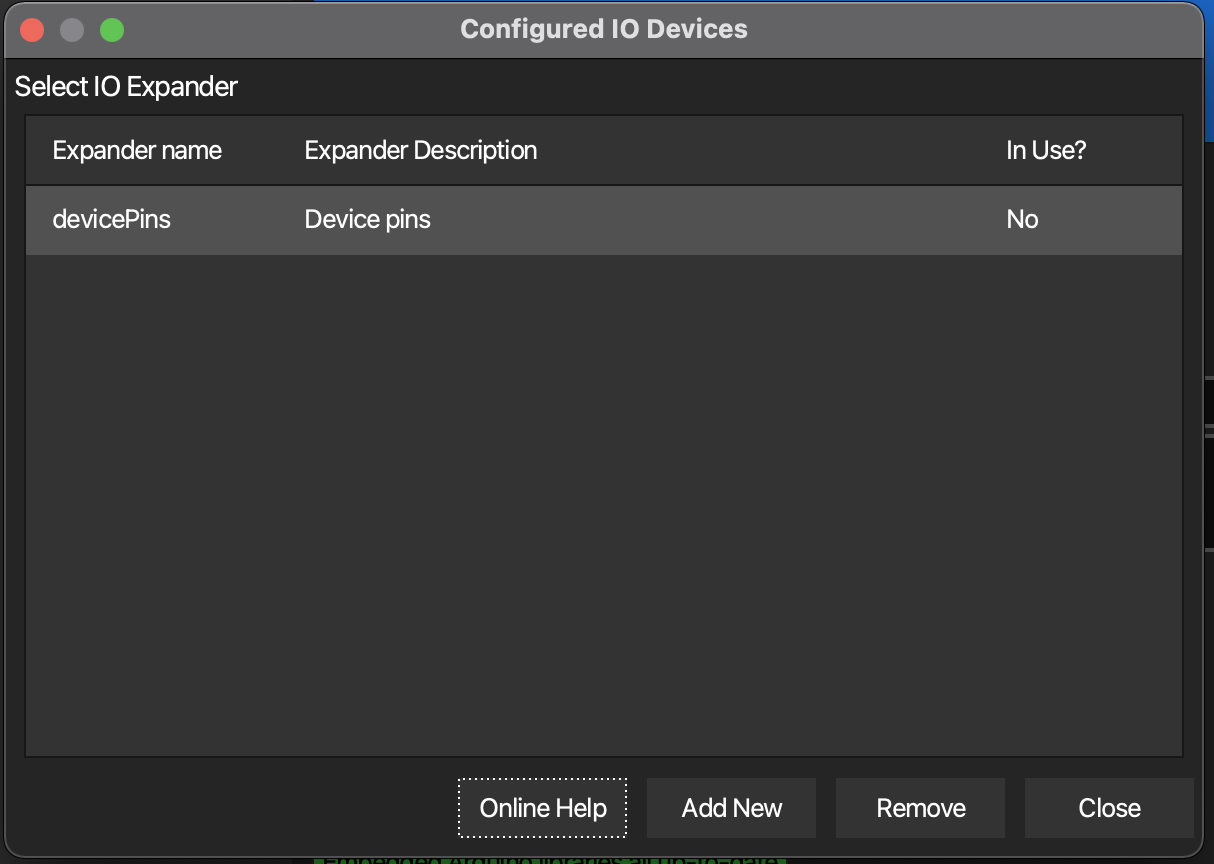
When we discuss IO devices we are talking about IoAbstractionRef objects that refer to either device pins, or any other device such as I2C expanders or shift registers from the IoAbstraction library. In order to manage the IO Expanders that are available within a project you can do so from the Code menu -> Show Io Expanders. Once that menu option is selected the following dialog appears:

From this dialog you can add, edit and remove IO expanders. By default, the “device pins” option is always there, and when you don’t want to use any kind of IO expansion device, choose this option.
Note that if the above dialog is shown from within code generator, it will have an extra “Select” button available, pressing select chooses that IO Expander.
Choosing an IO Expander from within code generator
In code generator, any properties that require an IO expander will be presented as follows:

You cannot type directly in this field, instead you select an IO expander by pressing “Choose IO”. At this point the above IO expander management dialog is shown. You can select an expander and the press the “Select” button.
Adding a new IO Expander
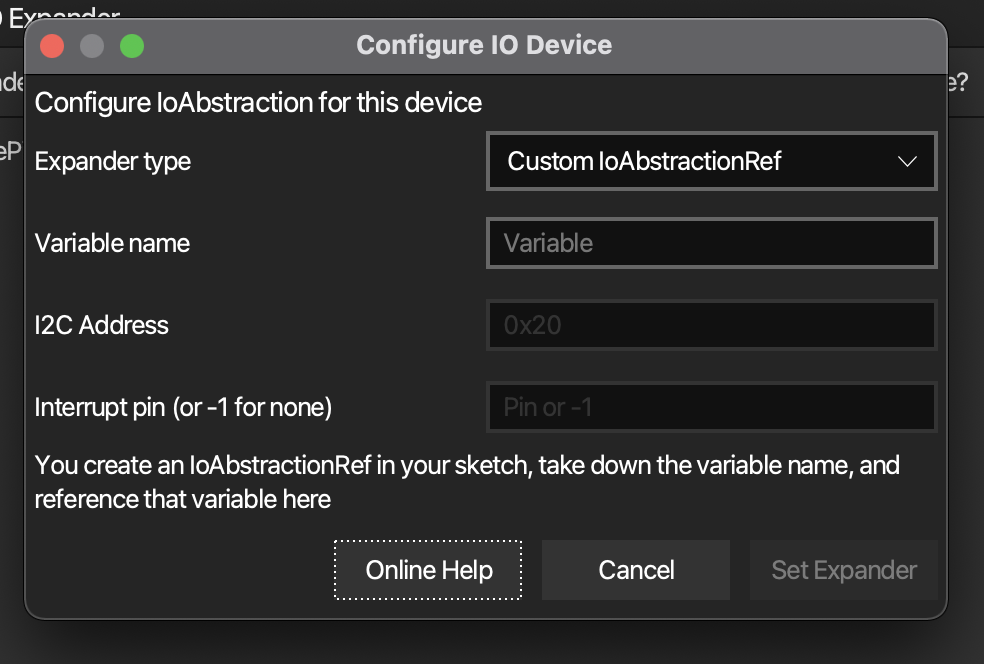
Press the “Add New” button in to start, you’ll be presented with a dialog like below.

Firstly, you select the IO expander, at the moment code generator can generate all the code for connection on regular device pins, and also for common I2C devices. However, at the moment, for other cases you use the custom case, where you set up the expander yourself.
Adding Custom IO
With custom IO, you create a new IO expander choosing the custom option, once you’ve done this, you’ll need to create an expander with the same name in your sketch. The variable you create in your sketch must be global and not marked as static, so that it can be accessed as extern. For example:
// outside of any function, at global level
IoAbstractionRef myIoOverI2c = ioFrom8574(0x20, 0);
You would then create the expander as custom, with name myIoOverI2c.
Adding PCF8574 or MCP23017 IO
With the I2C options, you just provide a name, the I2C address and optionally the interrupt pin (or -1 for no interrupt pin). There is nothing further for you to do in this case, the expander will be created by code generator on your behalf. It will use the default I2C option for your board.
For both options the variable will be exported for you to use as well if you wish, it will be exported as ioexp_{variableName}. For MCP23017, the Open-Drain LOW interrupt mode is assumed.
NOTE for mbed: continue to manually define I2C expanders as before (using the custom option), as the I2C implementation cannot be guessed, we cannot auto create them for you.
Editing an existing IO Expander
To edit an expander, double-click on the item in the manager window, it will pop up for editing, you cannot change the name when editing.
Removing an IO expander from the project
Caution, choosing this option will remove the IO Expander irretrievably from the project.
You can remove any item that is not in use other than the internal device pins option that is always available.
Note: It is possible that during code generation, the in use flag may not be reliable. We only recommend deleting items from the main menu when not using the code generator dialog.
Other pages within this category
- TcMenu - Overview and quick start
- Multi language locale based menu for Arduino and mbed
- Embedded Java for Raspberry PI and other embedded Linux
- Setting up IO-expanders in the menu designer
- Integrating EEPROM support into menu applications
- Securing sub-menus and remote connections with an Authenticator
- Taking over the display from a renderer
- MenuManager and menu iteration
- Rendering menus to TFT, LCD and OLED using tcMenu
- Menu control using a matrix keyboard
- TcMenu Designer UI - worked example
- Working with Menu Item types in tcMenu
- Working with menu structures using the CLI
- Creating and using Bitmaps and Title Widgets in your menu
- Code Generator and Plugins guide
